I've tried to research 'actual' buildings from photographs rather than copy other peoples' terrain. Sometimes terrain and scenery can end up looking like what wargamers think it should look like, not what it actually looks like.
Matakishi's site has lots on making buildings using cork tiles:
http://www.matakishi.com/makingdesertbuildings.htm
http://www.matakishi.com/afghancompoundbuild.htm
I like to use an MDF base because it's cheap and very sturdy. I prefer cork tile to foam board because it's easy to cut and paint, relatively cheap and easliy available, and has the texture I want for this project.
Here are some photos that I researched. The top two are from Afghanistan and the bottom one from Tunisia (copyright may exist on the above images)
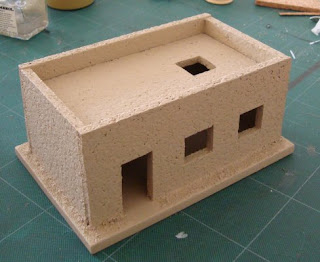
I've cut the basic shapes from 4mm unlacquered cork tile. You can get 10 of these 30cm square for about £12 delivered on eBay. You need the plain ones, not lacquered or with self- adhesive on one side. One pack of tiles is enough for lots of buildings. A biro for marking out, a steel ruler and a sharp Stanley type knife were used.
I've used Evostick contact adhesive to stick the cork tile pieces together and to an MDF base 10cm by 20cm. This glue is perfect for use on cork tiles and forms a strong bond. I've glued in balsa props to each corner to help get a 90 degree angle. Note that I've cut them all to the same length and slightly shorter than the walls. This is so that they support the roof and leave a small wall above the roof level.
I've also sprinkled sand on PVA around the base. Games Workshop sell sand in a tiny tub for £5 but I got a pillow sized bag from B&Q for half that. I filled an old aluminium take away carton with the damp sand and put it in the switched off oven after cooking. This dried the sand out and after sieving it to remove the large stones (keep these for basing) I got a large jam jar full ready to use on figure basing and terrain.
To ensure domestic harmony it's best to get your own model making utensils and not use the kitchen ones!
Here is the building with the roof sitting on the posts and an unpainted 28mm Empress SAS figure to show the scale.
I sealed the joins with PVA to fill any gaps and to add strength. I then primed the building with cheap B&Q all purpose white primer from a tin and used Sandtex exterior masonry paint as a base coat with a lighter coat drybrushed over the top. Homebase do some really cheap testers for less than £3- one pot would do an entire village so save your expensive miniature paints!
When this had dried overnight I used a very thin wash of dark brown to bring out the detail. I think the rough cork tile texture looks like a natural mud or brick surface without adding any additional texturing.
NEXT: As can be seen from the research photographs, these type of buildings are very basic, but I want to add a bit of character. I'm going to add some metal roller blinds using plasticard, and some dark brown tufts. I might have to wait until Salute in April to pick these up.
:O)


No comments:
Post a Comment